Wanting to start a chalk painting project but don’t know where to begin? Here are 7 super simple chalk painting tips for beginners to get you started right now! Check out these easy to follow steps for chalk painting success!
It’s no doubt that in these times of DIY design we love to create our own unique decorating styles for our homes. And in looking for ways to add beautiful and useful pieces into our living spaces we look for fun and creative ways to be inspired. And for me that was constantly looking at country style home decorating magazines! The beautiful rooms on those pages made me want to create the same kind of beauty in my own home!! I wanted that beautiful antiqued looking furniture and I wanted it at a price I could afford!! But truth be told, I didn’t have a clue how to achieve it!
But, because I was so inspired and determined to re-create this country style in my rooms, I started looking into how to find furniture that looked “old”, antique or vintage. I loved these old style pieces and the feel they brought to the rooms on the pages of those magazines! But for me, they not only had to beautiful – they had to be useful!! They had to help simplfy our living space. Because we were raising 8 kids in a small house, using our space to it’s best potential was really important!
WANT TO LEARN HOW EASY CHALK PAINTING REALLY IS?
 If you are NEW to CHALK PAINTING and READY to learn how EASY it really is then this CHECKLIST is for you!!
My challenge was finding what I liked and making it look like what I loved in the magazine, right?
So I started trying to replicate some of the chalk painted furniture in those pictures and as I did I fell in love with “Chalk Paint”! It was the beginning of a long lasting love affair!
I get questions almost daily on how to paint “something” with chalk paint. People ask about painting kitchen cupboards, dressers, desks, bathroom vanities and tables just to name a few!. Their biggest fear, and what keeps them from getting started, is that they are afraid they will mess it up! I know this feeling……..because I was the same way!! I bought all the supplies, brought them home, unpacked everything – and even opened the paint can….. and then I just froze up! Afraid to start!!
It reminded me of when I bought my first DeWalt miter saw. I read the manual twice and it still took me 30 days before I was confident enough to take it out of the box and plug it in!!
What I learned is that you just have to take that first. little. step. – you just have to do it!
My reassurance to you is this….Chalk Painting is super easy……. you can’t mess it up!!
Create This!!

So I decided that I should share my 7 super simple chalk painting tips with you so you can quit worrying about not getting it right!! Using these tips you can get started on your project right now! No worries.…
7 Super Simple Chalk Painting Tips for Beginners!
These tips will make your painting project a breeze – get the 7 Super Simple Chalk Painting Tips for Beginners checklist digital download here!
1. Pick out your project.
This step is maybe one of the most fun parts of chalk painting!! I love going on the hunt for a new old piece of furniture to paint and repurpose. It doesn’t have to be anything big – and I would recommend if this is your first project you choose something smaller, like an end table or a small bench. My first piece was a small dresser and it was not hard at all. It took a little time but it turned out great! So just dive in and remember that you won’t mess it up – chalk paint is very forgiving!
2. Round up your supplies.
What is it that you will need to complete your project? Have you decided what color of paint you want to use? Will you use wax or poly as a sealer? Will you need brushes or a roller – or maybe both? What about sand paper or a sanding block? No matter what you are planning to paint the list of supplies to have on hand is important! It is super frustrating to get half way done and realize you forgot something! Here is the Ultimate Chalk Painting Supply List for Beginners to help you find everything you need for your project!
3. Clean and Prepare your piece for painting.
This step, of course is not my favorite step, but it doesn’t require too much work! Chalk paint is designed to adhere to almost any surface. That being said, there is no need for major sanding or stripping off the finish that is on your piece. Just be sure to wipe it clean with a mild cleaner and let it air dry.
Also be sure to remove the hardware from your piece if there are knobs or handles or hinges that need to be removed.
If your piece has deep scratches or gouges that you want to repair before you paint you should do that now. You can fill the holes with a wood filler, let it dry and then sand it down until it is smooth. Be sure to then wipe it down good when you are done to remove all of the dust from the sanding.
4. Ready – Set – Paint!!
Now the fun begins!!

Ready…..
My favorite go-to chalk paint is Annie Sloan Chalk Paint! I use this brand for almost all of my projects. The first step here is to prepare the paint. It is suggested that you do not shake this paint, but gently stir it instead. I turn the can upside down and let it set for about 5 minutes. This allows the paint to move from the bottom of the can to the top and begin mixing itself. After I turn it back over and open the can I use a wooden paint stick to stir it until it is mixed well.
Set…..
In some instances the paint may appear to be thick. If you think it looks too thick – or when you put your first couple of strokes of paint on and it seems thick – you can thin it with a small amount of water. To do this I recommend that you pour some of the paint into a seperate container and then add a small amount of water. Stir it well and work with it until it is a consistency you feel comfortable with. Now try it again on your project.
Paint…..
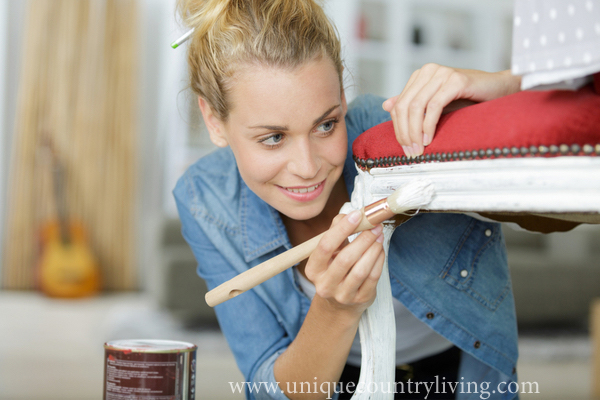
Start applying your first coat using the paint brush. You can use the sponge roller if you have larger areas that need painted. The paint dries fairly fast so be sure to keep moving along at a steady pace. Watch as you are painting to be sure that paint is not dripping over the edges or leaving any drip marks on your piece. If you get paint on a piece that you didn’t want painted (like the inside of a drawer) just use a damp wash cloth to wipe it off.
Paint in the direction of the grain of the wood. This is not a hard and fast rule that is set in stone – but it has worked well for me in my experience. There are other techniques that show how to paint in a criss-cross action to create a more unique finish. You can try each technique to see which you like better.
After the first coat is dry you can apply your second coat of paint in the same manner.
5. Sanding and Distressing
Once your paint has dried you are ready to start sanding. If you are happy with the way the paint looks and feels without sanding then you won’t have to continue with this sanding and distressing step.
Sanding…..
If, on the other hand, you are wanting to feel how smooth this paint really is then I encourage you to sand it down using very fine sand paper, maybe 200 grit or so. The result is the most amazing buttery soft feeling imaginable! You will love how it feels!
More Sanding…..
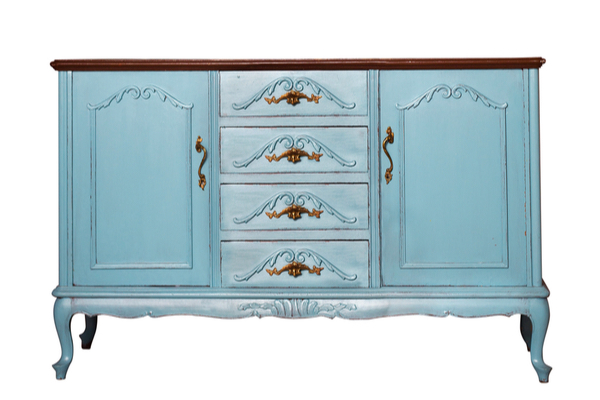
To give your piece an older look – “distressed” or “antiqued” you can continue sanding until you sand through some of the paint all the way down to the original finish. Sand in the areas where you would imagine this piece would have been most worn, like the corners and edges. This can be done minimally – taking only a small amount of paint off or you can really go for it and sand off larger areas! This is really going to be dependent on what look you are trying to achieve. You probably already have an idea in mind of how you distressed or antiqued you want this project to turn out!!
The best part about it – if you think you sanded too much off – just throw on another coat of paint – let it dry and try again!! Like I said – you really can’t mess it up!! It is so forgiving….
So be brave and enjoy the results!!
6. Sealing with Wax or Poly
The Waxing Process
In the process of learning how to chalk paint, this was another step that intimidated me! I was scared to death that after I had created something beautiful using the paint – now I might ruin it using the wax. But again, as I found out by jumping in and giving it a try, this was not at all true!! Actually, it is pure joy watching the transformation! It is very easy to apply and gives your piece an incredibly soft and beautiful finish.
Annie Sloan Soft Clear Wax is an amazing product and I love it!! To apply it to your piece just open the can and use your wax brush to dip into the can. The wax has a texture somewhat like Crisco in the can, making it easy to get a little dab on the end of your brush.
Wax on …..
You can start putting it onto your piece by rubbing it in circular motions then follow up with longer straight strokes – again with the grain of your project. Work in sections getting the wax spread on in a thin layer. You will be able to see the areas that you have waxed as they add a little bit of richness and enhance the color of the paint.
Wax off…..
After the wax is spread evenly onto your piece use a lint free cloth and wipe across it a couple of times to remove any excess wax. For this step I like using old rags or t-shirts – but I have used the blue shop paper towels that are disposable and they work just as well!
If you would like your project to have a bit of a shine to the finish – let the wax dry overnight and then use your soft rag again to start polishing. Start rubbing back and forth across the piece with a bit of pressure and you will see it start to have a bit of a shine! This is the finish I love the best!! It looks good and it feels wonderful!
Use your piece lightly for the first 7 days. The wax will be dry but it does take time to cure or harden. After it has cured it will be incredibly durable. This process of curing will take anywhere from 7 days in drier climates to 30 days in more humid climates.
Annie Sloan also has dark wax, black wax and white wax! We will try those out in another project tutorial! So stay tuned for that!
Any project that you are going to finish with wax should be given a coat of clear wax first. Why? It will give a base for any other color you plan to use – so if you are going to add a dark wax to give your piece more antiquing or to bring out some of the beautiful details – the clear wax will act as a bit of a barrier and blender for the dark wax. It allows it to move more freely and give you the ability to lift off some of the dark wax if it gets too dark in spots.
The Poly Process
This process is really simple also! The hardest part of this was finding what product I really liked best! There are so many to choose from. You can see my favorites in this supply list.
The technique is similar to applying the paint and I recommend using two coats of poly. Use a paint brush or a foam brush, which ever you prefer, to apply a thin coat evenly onto your piece and then let it dry.
When it is dry, and before your second coat of poly, lightly sand the first coat. This will make the first layer feel smooth and it will rough up the surface just enough to make the second coat really adhere well. Wipe your piece down with a cloth to remove any of the dust and then apply the second coat of poly!! Even though it may feel dry to the touch in a couple hours – I would let it set overnight before I started using it!!
Woop… woop!! YOU did it!! Isn’t it gorgeous?? Don’t you just LOVE it!!! And aren’t you glad you gave this Chalk Painting thing a try!!! Please share a photo of it…. I would love to see it!!
7. Decorating with your Masterpiece
This is the part that you have been waiting for right? The part where your vision becomes a reality!! The pictures in the country decorating magazines start showing up in your own living room and kitchen and bathroom and you realize that this chalk painting thing – it is not as big of a challenge as you thought it was!! It is actually pretty simple when you follow these easy tips!!
You had a decorating idea in mind when we started painting, then you created a Masterpiece and now you can put it to work for you! Is it a Vintage China Hutch repurposed into a Bathroom Beauty Cabinet? A Deadbeat Dresser transformed into a Cool Coffee Bar? Or an Antique Buffett turned into a Media Center?
What ever it is – use it to it’s fullest potential! Most likey it has awesome possibilities! And remember – YOU created it!!
Congratulations on a job well done!!
P.S. – I would love to know what you created! Please share it with me and if you have questions be sure to include them as well!!
Happy painting & decorating~
